Showing posts with label Step-By-Step. Show all posts

Wednesday, January 1, 2020

Pocket Plein Air Kit

Inspiration

I wanted a pocket plein air kit; I'd seen some done with mint tins, but when I found a glass screen protector tin, I figured it would be more useful and I could carry all my supplies in it.  As always, I'm on a budget but I still want something beautiful and durable.

Goal

I had to revamp my plans a few times, but it got there in the end!

Materials

  • A glass screen protector case I found*
  • 400 grit sandpaper*, borrowed from my mother's shop
  • Rustoleum Hammered Metal spray paint* in a charcoal color, borrowed from my mother's shop
  • A piece of thick flexible plastic I found*
  • A sharpie*
  • Hot glue and glue gun*, borrowed from my mother's shop
  • Sheet magnet with ads removed*, cut into appropriately-sized pieces
  • A straight pin box*
  • A metal pencil case I found*
  • Double-stick tape*
  • Plumber's putty* that was a gift
  • 15 duplicate watercolor paint pans from my own supplies*
  • Travel brushes, pencil, eraser, fine waterproof pen from my own supplies*
  • Rulers, pens, pencils, paper, newspaper, latex gloves and scissors for the process*

Step 1:  Design the overall layout.

A glass screen protector case seemed like a good DIY pocket plein air watercolor kit. I planned to use hot glue to make paint pans and fill them with tube watercolors and let the paint dry. (Rubber bands were temporary.)

Here's the initial mockup to see if items would fit.  The top left of the tin contains the straight pin box I plan to use for clean water.  The gap at the top of the tin has space for six paint wells separated by hot glue.  


Step 2:  Draw the layout and prep the tin

Here's the plan and the tin, sanded with 400 grit paper so the charcoal-colored Rustoleum Hammered Metal spray paint would stick.

I added a second coat of paint to hide the colors of the tin; a primer may have helped.  It takes a long time to completely dry and stop off-gassing.  Wear the latex gloves and place the tin top and bottom paint side up on old newspaper; move to clean newspaper to dry so they won't stick.


Step 3:  Transfer the hot glue layout. 

I used a piece of flexible heavier plastic to make a template to transfer the hot glue layout into the inside of the tin.  I cut the lines with scissors and drew them with a Sharpie.  I added the hot glue and quickly removed it when I realized how uncontrollable it was -- there'd be too many crevices for paint and I'd never be able to change colors.  Plus the glue was spreading too much and would have taken up too much of the room intended for the paint.

I also realized that wet paints and pens would be messy, so I had to revamp my plans. 


Step 4:  Measure pans and cut magnets.

I cut up adhesive refrigerator magnet ads to fit the backs of my duplicate existing pans. (I first checked that they would fit in the closed tin.)  I used a contrasting pen. (Next time I’d take the time to get a waterproof one, and use the good ruler that doesn’t slide.)

I had two magnets and I cut the other one to fit the inside of the lid, and cut a few additional pan-sized pieces.  In total this made 56 pan-sized pieces.


Step 5: Redesign the layout.

I have fifteen duplicates paint pans and room for one more in the bottom right corner. I will add plumber's putty to create mixing areas above and below the water well. (The remaining 40 magnets for additional pans are shown in the pin box that amazingly fits.)  The magnet to the inside of the lid will keep it under the open tin. I will add double stick tape to adhere the magnets to the various surfaces. This old pencil tin  fits my minimum utensil needs.


Step 6:  Record the updated layout.

Make note of where everything goes.  I will probably list these paints in the design, but the magnets mean I can swap out other pans at any time.  I will paint out my palette and keep it with me.  I left room to record the brand and style of the brushes when I look them up.


Step 7:  The closed tins. 

Before you assemble this with any tape, make sure they close well with everything you've included!


Step 8:  The finished project!

Before you assemble this with any tape, make sure they close well with everything you've included!
I may see if I can include a water brush and see if I like how that works.


WORK IN PROGRESS

Sunday, April 1, 2018

Bed-Bound and Bored, or "The Perfect Plein Air Sketching Setup"

Inspiration


Goal


An injury leaves me unable to sit or stand for long until some months of rehabilitation after surgery, so I need something like a lap desk that will allow me to paint small things in a reclining position, and not go insane from boredom.

I made this one rather large as I don't plan to travel with it.  I will probably make another smaller one in the future, and have a smaller travel palette as well as a collapsible water cup and a better brush carrier system.  I've added notes about what materials I'd change for the next one.  The starred items were "found" items from my house or one of my parents', so the total cost of this board was about $10, not including any art supplies.
 

Materials

  • 1/8" plywood*, high quality at least on one side, 18" x 24" (or small enough to fit in a back pack or carry-on for travel), cut to size in my father's shop
  • Off-white satin no-prime latex paint* (verathane would be better, or at least gloss)
  • One 3" paint brush* borrowed from my mother's shop
  • 18" of 1/4" width elastic* for sewing, white (a dark color would show dirt less)
  • 17 small finish nails* or brads, make sure the head is broad enough, 3/4" long (shorter would be better)
  • One finish hammer,* or other small hammer, borrowed from my mother's shop
  • 8" of 1" wide strip stick-on velcro, cut to 4" lengths (or 16" if you have more than one palette to swap)
  • One plastic cup* for water, of dimensions you like (a collapsible one would pack better, and I'd prefer two cups, one for washing out the brush and one for rinsing)
  • Hot glue* didn't hold the magnet inside the cup, so I'm now trying Scotch superglue gel.*  (I like this one because it doesn't set before you can align the pieces and seems to hold for years.)
  • Two strong magnets* (test to make sure they'll hold the water cup in place through the board) 
  • A 'clear' industrial strength tape called Tough Tape to tape one magnet on the back of the board  (could have used white duct tape to match the paint)
  • One new 'natural' (non-plastic) kitchen sponge
  • One 1" binder clip* for holding the sponge
  • One wooden suitcase-style art supply case* that was a gift in my childhood, used for storage.  I removed the plastic trays and moved the supplies to a lidded plastic storage box.
  • (You could attach a pillow to the back to make it a true lap desk if you prefer.  I have lapdesks I will probably use under this.)
  • A carpenter's tape measure*, borrowed


Step 1:  Design the board's size and overall layout

Consider not only where you will use the board, but how you will transport it.  Do you want a board that fits luggage you currently own, or will you need to buy something new to keep as a 'kit'?  How big of a board will this be?  Is it necessary that it's all flat-pack or low-profile?  If I'd considered it in advance, I would have cut the board to fit inside the art case.  As it is, I may use velcro or staple in some elastic straps to store supplies in both the top and the bottom of the case.  Eventually I'll get a smaller zippered mesh case with multiple sections so I can carry my supplies more compactly with a smaller travel board.

What are your cost limitations?  This was officially a gift, so I could have spent more, but the options in the art stores were too limited, and I was able to use borrowed and donated supplies.  How crafty are you?  I'm handy, so I enjoyed making it, but it would be possible to purchase gessoboard or a corrugated plastic board that didn't need a table saw or paint.

What are your space and supply limitations?  A verathaned board would mean I could tape directly to the board, but I didn't want the hassle of using verathane or the curing time.  In retrospect, I probably had time.  I spent a week visiting family with garages and shops, but I wouldn't have been able to use verathane at home; low-odor latex may have been okay.  I had access to more tools there than at home.  I wouldn't have wanted to buy a quart of paint and a brush when I only used a few ounces of paint.  I certainly wouldn't have bought an electric saw for this.  I wouldn't have room to store it, never mind the cost!


Step 2:  Assemble the supplies first

I had to make a few design changes on the fly.  I did find a drill bit gauge as used in the inspiration post, but the plastic was too flimsy.  I looked at circle templates, but not only was the plastic too flimsy, the circles were too big.  I considered using the plastic carrying tube for the brushes and mounting that somehow on the board, but found that too awkward and limiting -- no room for drawing utensils!  I tried a few different cups and magnets.  I had to reassess how I'd apply the velcro so my standard-sized palettes would fit and still allow space for the paper.


Step 3:  Prepare the board

Cut the board to size.  Sand the surfaces smooth and use sandpaper to round the edges.  Dust the board.  Wait for the dust to settle.  Paint the edges and the front; let it dry.  Paint the back; let it dry.  Using ~400 grit sandpaper, sand the front and dust it.  Wait for the dust to settle.  Paint the front of the board and let it dry again.  Repeat as many layers as you see fit. 


Step 4: Lay out the materials on the board

Make sure everything will fit the way you want it to.  Put the brushes or water cup and sponge on the other sides if that's more comfortable for you.  Is the result fairly balanced?


Step 5: Cut and attach the velcro

I put the rough velcro on the board and the soft velcro on the palettes, in case I want to use the palettes elsewhere and not scratch things.  I cut 4" strips because that fit both of my palettes.  I attached the soft velcro to the back of one of my palettes, then put the rough on that.  I peeled the plastic off of the back of the rough, and used the palette to place the rough on the art board.  I then attached more strips of soft velcro to the rough, peeled the plastic of the backs, and aligned my other palette on top of that.  This was the easiest way to ensure the right alignment and spacing when I couldn't see between the art board and the palettes.


Step 6:  Cut and attach the elastic

With the board securely balanced on a chair seat or other sturdy low surface, I leaned the board up against the edge of the shop table and held it in place with my knee.  I folded over the end of the elastic so a frayed edge wouldn't show, centered the finish nail, and carefully tapped it in, seating it flush with the board, creating a dimple in the elastic.  This is tricky with 1/8" plywood, and shorter nails would have been less likely to split the wood.  I put a strip of masking tape over that end of the board to cover any possible splinters.  I stretched the elastic ever so slightly and folded under the other end and nailed it into place.  I measured halfway and added another nail.  I continued to place nails halfway between other nails until they were all spaced about 1" apart.


Step 7:  Attach the water cup

Estimate the position of the water cup with the magnet inside and place the other magnet on the back.  Carefully turn the board over and tape over the magnet on the back.  Righting the board, remove the cup and other magnet.  Place glue on the bottom of the magnet (remembering the orientation) and place it inside the cup, then place the cup on the board over the other magnet, using the magnetic force to hold it in place while the glue dries.


Step 8:  Attach the sponge

Clean the sponge thoroughly first; mine was shipped with vinegar and who knows what else in it.  Depending on the size of your board and other materials, you may want to cut the sponge in half.  I used a sponge with a scrubby on one side, and separated the scrubby from the sponge enough to insert one side of the binder clip.  You can probably also use a non-scrubby sponge and clip the whole edge of the sponge to the board.


Step 9: Ensure your art supplies fit in your storage or travel kit


I have two watercolor palettes in the box, but I probably wouldn't travel with both.  I will use velcro to store some art supplies inside the lid.

The water cup has a lid for dry travel!  I will get a collapsible water cup.  I will also buy brush storage that fits inside the travel / storage kit.


Step 10:  Add your art supplies to your board and enjoy!


Update 12.April.2018:

My first test.  I need to find a small, bright, clip-on LED lamp and I will need a breakfast-in-bed lap-table to keep it off of my legs.  I should have cut a handle just under the top strip of velcro (not seen in this image as it's under the palette).  I can move the palette down so it's easier to reach, but it would be better if I turn it 90˚ as well.  It might have been better to make it less deep, or I may need to move the magnet that holds the water cup.  I need a way to change the water more easily than going to the sink, and I will want to have several small projects to alternate while layers dry.  I did find a place to put the palette while it dries.  I don't know what people do who use them for plein air activities.
 

Update 19.October.2018:

I will cut the board down to size so it fits in the carry case.  This will make it easier to reach the palette and the water cups, as well as help it fit on my lap.  I may need to turn the palette so I have more room for the painting.  I will attach a second magnet for a second water cup, so I can have one for dirty water and one for clean.  I am considering travel brushes and two lidded collapsible water cups that will fit inside the carry case.


Update 02. January.2019:

I have cut the board down to size so it fits in the carry case, repainted the edge, and re-finished the end of the elastic on the other edge.  I've attached a second magnet for a second water cup.  I now have a set of four travel brushes and one lidded collapsible water cup that will fit inside the case.


More pictures to follow.


Friday, November 3, 2017

Piecework Christmas Stockings

Goal


Inspiration

My eldest aunt was an award-winning quilter and designer.  She made me the red Christmas stocking when I was little.  I used that for the general shape and size.  She also made quilts with the "log cabin" design, including one that was intentionally askew she called the "drunken homesteader."  I used this for my template.  My mother does piecework and has an array of leftover pieces.  This was my first attempt at piecework. 


Materials

  • Large graph paper, pencil, eraser, ruler, pen, and marker for the template
  • Scraps of fabrics in reds, greens, holiday fabrics, and a few complementary colors
  • Cork board and pins for layout
  • Sewing machine and threads in similar colors
  • Patience, a seam ripper, and extra pieces


Step 1:  Outline the shape with a pencil on a large sheet of graph paper


Plain paper would also work, but graph paper will make the next step easier.


Step 2a:  Choose square size


I chose squares not quite as wide as the leg of the stocking, and centered them in the leg, so I'd have two diagonal squares vertically and a total of three whole squares visible.  I considered the size of the pieces I could cut from existing scraps.  I decided each square would have one square center and two rows of "logs".  You may have to adjust your stocking size (and outline).


Step 2b:  Determine piece sizes


Don't forget to account for seam allowance.  I chose piece sizes based on what I could cut into squares and logs out of the existing small pieces.  The square size relative to the stocking size may change your piece size, or your piece sizes might determine the number of log rows and square size.


Step 2c:  Choose color pattern


Each square alternates a red or green center.  The red centers have a first row of logs surrounding it in green, and the second row of logs around that are red, and vice versa for the green centers.  The color pattern may change the number of log rows you include. 

I also chose a unique "signature" center for each person I was gifting, so they could easily identify their stockings--an orange clownfish and a blue clownfish for each sibling and a silver snowflake on a black background for the parent.  This also indicates the accessory color for each stocking.  The orange clownfish also has magenta douches and the blue clownfish has teal and purple.  The snowflake has black and more earthy reds and greens.


Step 3:  Determine number of squares

A stocking is a fairly small item, so I chose to make unique squares for all but the smallest corners of partial squares--those were cut off of other squares.  On larger or more symmetrical items I might use half of each edge square on another side.


Step 4: Cut center squares

One center per square, but cut extra in case you need to swap for overall color palette, or in case you damage some.  Choose larger patterns and cut an identifiable piece.


Step 5: Calculate rough numbers of logs of each size, and cut extra

Four small logs and four large logs per square.  Roughly half reds and half greens, with some other Christmasy-enough and sparkly fabrics.  Choose smaller patterns, some solids, some tone-on-tone, some vibrantly patterned.  The more variety the better, but you will be repeating some of course.


Step 6: Arrange center squares

Array them together and substitute individual centers until the whole array is pleasing.  Lay them out on the template, pinning them to the upright cork board through the paper.


Step 7:  Choose four small logs and four large logs for each square

Array them together and substitute individual centers until the whole array is pleasing.  Lay them out on the template, pinning them to the upright cork board through the paper, as in the image on the left.  Then arrange them into squares so you have a rough idea that no two that are too similar will be next to each other, as in the image on the right.  Notice the "stacks" of each size and color 'type' pinned to the sides of each paper.  These have randomized pieces of similar pattern and color.  Each set of four was one solid, one tonal, one patterned, and one 'special', a.k.a. Christmas or glitter.  As you may see, 'solid' sometimes included a simple polka dot or stripe.  Don't be too literal with the categories.


Step 8:  Step back (or walk away for a while), to see if you like the overall effect

Change out any pieces that seem too obvious or individual.


Step 9a:  Sew the first 'ring' of logs

Unpin one center and its small logs so you have a stack of short logs.  Sew the inner logs to the center, sort of in a circle.  (I'm not going to detail this, because I don't have a step-by-step, and it's been too long since I made these.)  Pin each partially finished square back into place.


Step 9b:  Iron and trim the squares

Unpin the unfinished squares one-by-one and iron them, then trim each to square.


Step 10a:  Sew the first 'ring' of logs

Unpin one center and its large logs so you have a large of short logs.  Sew the outer logs to the inner ones, sort of in a circle.  (I'm not going to detail this, because I don't have a step-by-step, and it's been too long since I made these.)  Pin each finished square back into place.


Step 10b:  Iron and trim the squares

Unpin the finished squares one-by-one and iron them, then trim each to square and the size of the squares on your template, plus a seam allowance.


Step 11a:  Sew the squares into rows

Unpin one row of squares and stack them, then sew the first two together, and add the third to the second, etc.  Pin the row back into place.


Step 11b: Iron and trim the rows

Unpin the finished rows one-by-one and iron them, then trim each so they're all the same width.


Step 12a:  Sew the rows into together

Unpin the rows and stack them, then sew the first two together, and add the third to the second, etc.  Pin the whole piece back into place.


Step 12b:  Iron and trim the stocking

Unpin the piece and iron it, then trim the stocking to the correct shape, including a seam allowance.


Step 13:  Choose and cut batting and backing and/or lining fabrics

The backing fabric should be a complementary large-print Christmas fabric.  Something pleasant, but this will not be seen as much.  The lining fabric should be complementary, but can be plain as it will be inside.  Layer the backing fabric, batting, two layers of lining fabric, and another layer of batting behind the stocking.  Using the stocking as a template, cut the other layers. 


Step 14:  Sew the batting to the outer fabric for front and back


Step 15:  Sew lining pieces together with 'good sides' facing each other

This hides the seams of the stocking between the batting and the lining.


Step 16:  Slide the lining inside the stocking

Turn down the top edges so they're inside and iron them to stay in place.


Step 17:  Design and cut the pieces for the trim and the loop

The loop doesn't need batting--it's a strip of folded cloth sewn length-wise inside-out and turned right-side out.  I used a double layer of batting for the cuff, and wrapped a double width piece of white fabric around it so there would not be a seam at the top of the cuff.  Iron it so it has the correct shape.


Step 18:  Sew the cuff and loop to the stocking

Slide the unfinished edges of the cuff between the unfinished turned-down edges of the stocking.  Place the loop and tuck it's unfinished edges in the same way.  Pin these edges.  Sew the cuff to the top of the stocking, effectively extending the length of the stocking so you don't cover any of the piecework.


Step 19:  Tack the lining to stocking

By hand, in a few places around the edge, conceal tack stitches in the seams, anchoring the inner lining so it doesn't invert when presents are removed.


 Results


I would repeat this, but I'd make a few adjustments to the pattern.  I'd probably make the stocking taller with less interesting squares at the top, so I could turn the cuff down over them.  I'd worry less about the edge squares being unique as it would be difficult to tell one half from the other when cut apart, since the log fabrics are so varied.  I might change the way I assemble the entire stocking, but I'd have to look at patterns for ideas.  I did this all on-the-fly, as it were, without any pattern but the one that evolved as I went along. 

Sunday, October 29, 2017

Watercolor Fox Running

Goal


Materials

  • Some cold-press watercolor paper, ~15x20".
  • Some quality watercolor brushes my aunt gave me upon her trip from England.
  • A 24 pan set of Yarka St. Petersburg Artists' Watercolors she also gave me.
  • A set of 42+ Derwent watercolor pencils.
  • A jar for water, and lots of rinses and refills.


Step 1:  Sketch & Wash

I didn't have masking fluid, so I did this without.  Remember to leave white space.  I was able to paint a solid enough white for the eyes over the red-orange.


 Step 2:  First Wash Layer


Step 3:  Second Wash Layer, more intense and varied colors


Step 4:  Details


Step 5:  Finish


Saturday, October 28, 2017

Pencil Batman Gotham Heights

Goal


Materials

  • Newsprint, ~24x36"
  • Various drawing pencils
  • Assorted shapes and sizes of erasers


Step 1:  Sketch


Step 2:  Add detail and shade Batman


Step 3:  Add detail and shade Gotham


Step 4:  Add detail and shade cape


Step 5, Final:  Add background shapes in the mist and erase for midground mist effect

Wednesday, November 23, 2016

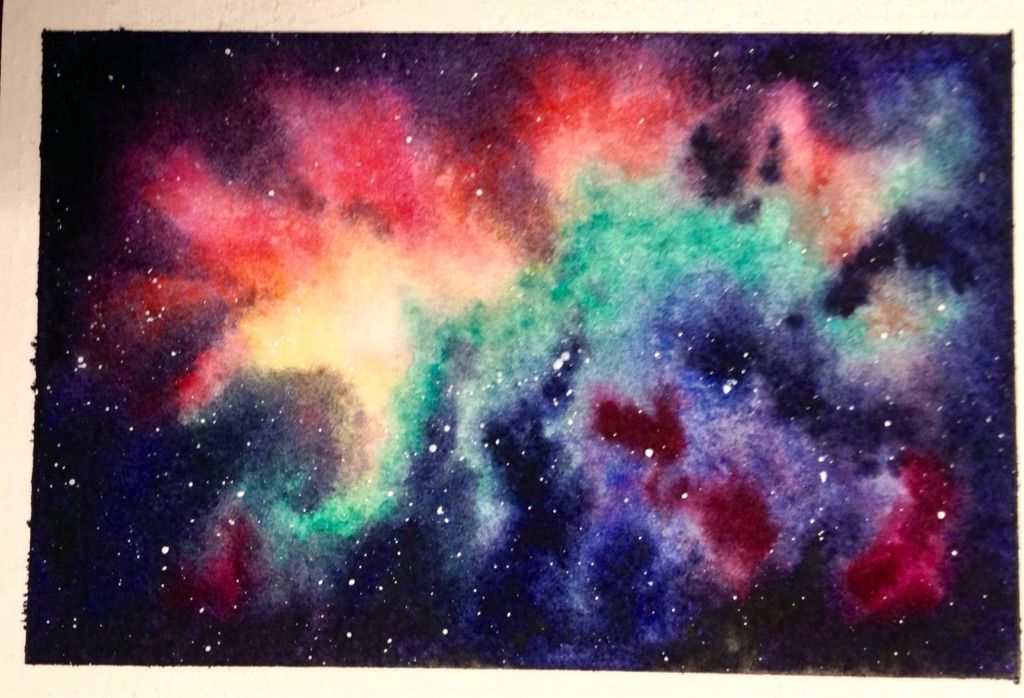
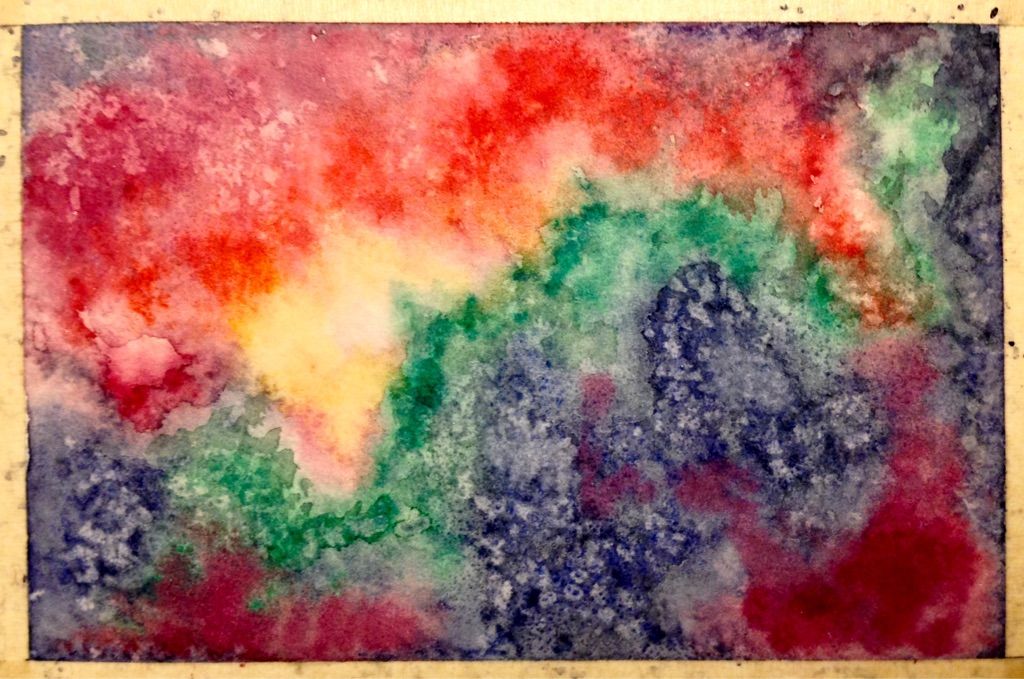
Watercolor Nebula or Galaxy

Goal


Inspiration

"How to Paint a Galaxy with Watercolor -- a Nebula -- Universe" via ArtVilla.

Materials

  • Some probably hot-press watercolor paper I cut into approximately 3.5" • 5" rectangles.
  • Various color papers cut into slightly larger rectangles for 'faux' matting.
  • A pack of white 5.25" • 7" blank white scored cards and envelopes.
  • Some quality watercolor brushes my aunt gave me upon her trip from England.
  • A 24 pan set of Yarka St. Petersburg Artists' Watercolors she also gave me.
  • A roll of 1" 3M Scotch Masking Tape.
  • A hard back vinyl-cover binder to tape the paper to.
  • A jar for water, and lots of rinses and refills.
  • Salt -- I used a fine sea salt because it was the coarsest I have. 
  • Opaque white paint. 
  • A tiny, gentle spray bottle full of plain, fresh water.


Step 1:  Prepare the colors for the first layer.

  • A light + dark red mixture.
  • A cherry.
  • A darkish blue.
  • A blue-ish green.


Step 2:  Wet the paper on a slight angle.

A lot of water allows the paints to bloom together across what would otherwise be white space.  Having the paper slightly tilted lets gravity aid the process.

Optional, first tape the paper to your surface to mask the edges.
Tip:  Stick the tape to clothing before applying to the paper.  This isn't the first time I've tried it, but I read online that this will keep it from tearing the paper.  However, this seems to tear the paper.  This time I tried sticking it twice to clothing.

Step 3:  Place colors and let them bloom together.

Place a few large, abstract blobs of each dilute hue about the paper.  Don't use too many or place them too closely, or you'll end up with mud.

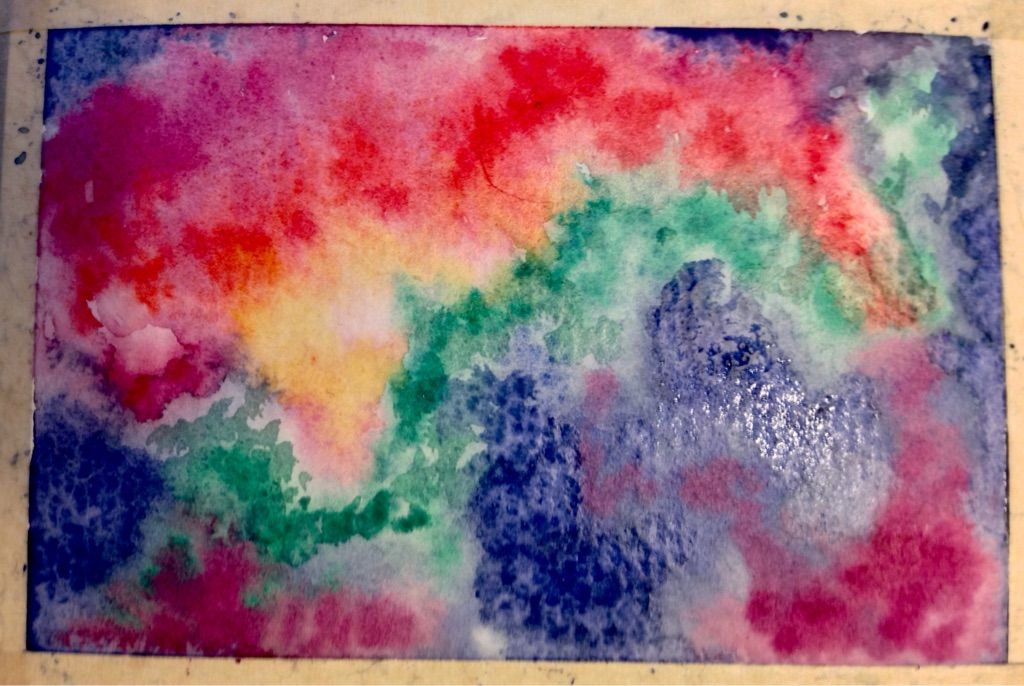
It started out too wet, and there were pools of muddying waters at the bottom edge, but it didn't stay wet long enough to get through the whole process--next time I'll remember to use the spray bottle!


Step 4:  As the paint begins to dry, add more intense pigments.

Place smaller abstract dabs of less dilute, pure pigment about the paper as it begins to dry.  These will still spread and bleed a bit, but not as much as on the wetter paper.

As the paint continues to dry add smaller dabs of even more intense pure pigment.


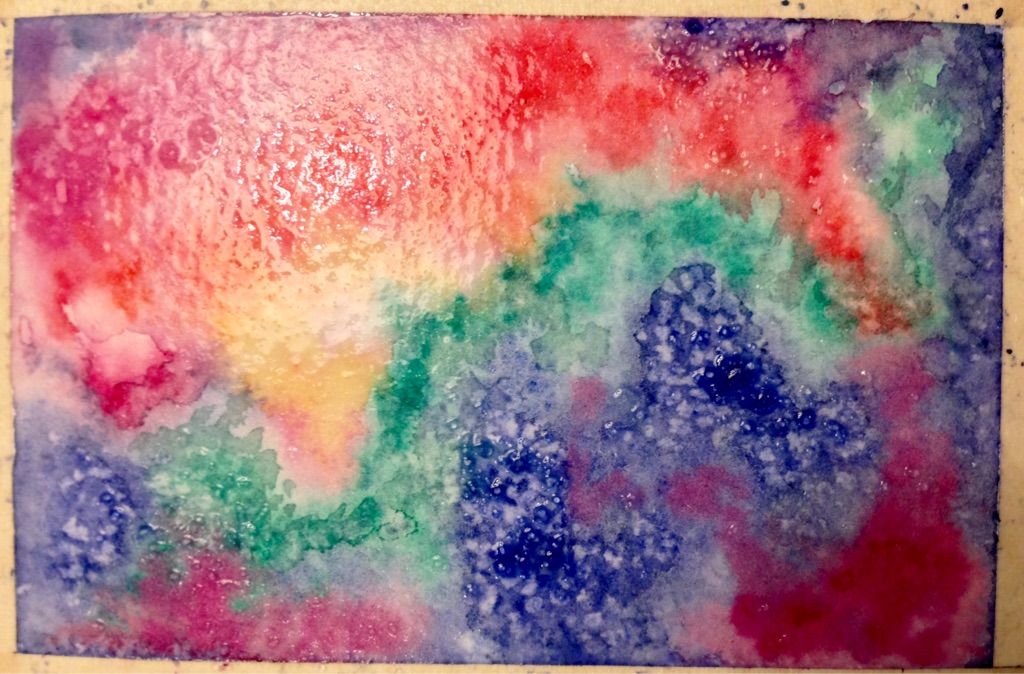
Step 5:  Sprinkle salt.

You want uneven distribution, some larger salt concentrations in the center of the nebula, and smaller ones further out.

In my case, I let the painting dry too much before I salted it, so I spritzed it with a tiny, gentle spray bottle full of plain water.  Also, in my hurry, I over-salted some areas, and the salt that doesn't dissolve will have to be carefully rubbed off.


Step 6:  Let the painting dry completely.

Rinse your brush(es) and change the water.

Step 7: Remove the salt.

Using clean hands, a paper towel, or a small piece of new kitchen sponge, gently brush off the salt.

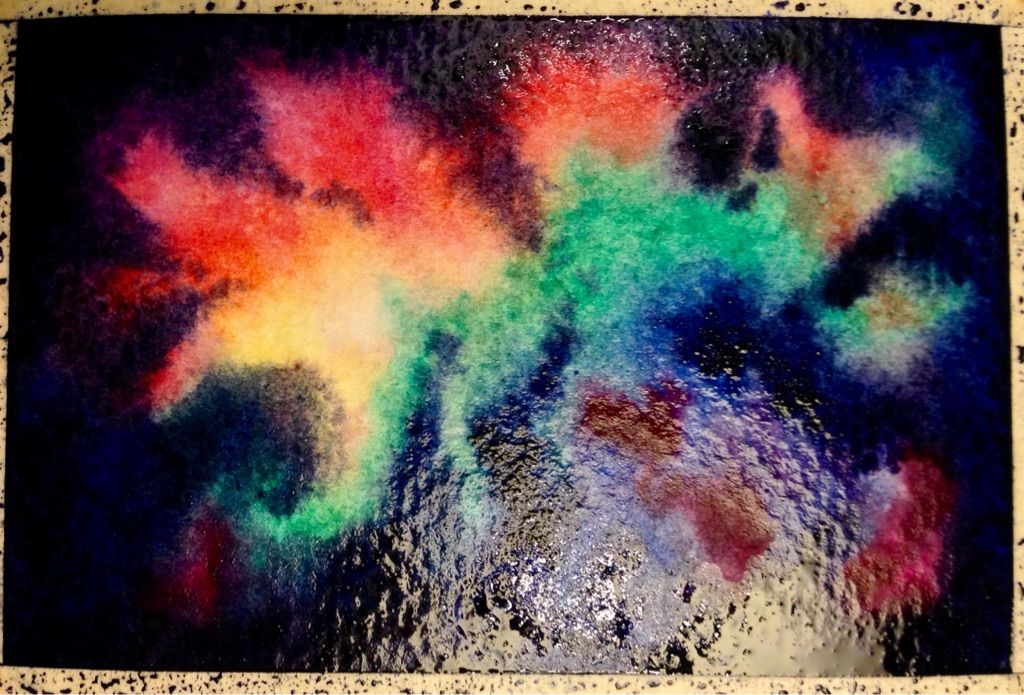
This image looks more intense than the painting at this stage, which is dry.


Step 8:  Wet the paper on a slight angle.

This is the same as the second step.  Do this quickly so as to minimize disturbance of the underlying layers of paint.


Step 9:  Add more intense, pure pigments on this layer.

Use yet more intense pigments to add this layer.

On this small scale, this step covered up the salt patterns, which weren't as dramatic as in the demonstration.  I'm tempted to do another salt stage, but I should follow along, and proceed to the next step.


Step 10:  With the paper still slightly damp, add dark borders.

This will be a dark blue-purple that fades toward the center.  Make sure to fuzz the edges of the borders around the center, so it has a natural cloud-edge.


Step 11:  Let the painting dry completely.

Rinse your brush(es) and change the water.


Step 12:  Splatter the stars.

Using opaque white paint with a lot of pigment and little water, load a fine-tip brush, and tap it gently, perpendicularly to another brush handle.  Different amounts of of paint on the brush, and different tap strengths will create smaller and larger splatters.  You want tiny star-like dots unevenly spread about the nebula.  Don't worry about small groupings of 'stars' or non-circular 'dots' because a few of those would be naturally seen in the night sky.  Try practicing this technique on scrap paper or a sheet of paper you keep for testing techniques.

Step 13:  Let the painting dry completely and remove the tape.

Rinse your brush(es) and change the water.


Results

I left the tape on a blank card on for a week or two--far too long.

I need to make a physical color scheme so I test my mixes in advance, and note the names of the colors I use.

I think I missed a layer of color, and if the middle layer is more washed out in the middle, it won't obscure the salt effect.

I like the overall result.  Making the above changes should make the painting go faster
and ultimately also look more realistic.  T
his is greeting-card size, so it will do double duty
as part of a set of greeting cards I'll give as a Christmas gift.